Tuesday, February 28, 2012

Coffee-Glazed Turkey Burgers with Apple Slaw and Baked Sweet Potato Fries

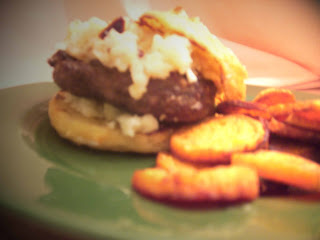
I've never really done any savory cooking with coffee. I've never made my own buns, either. I'd never even had a turkey burger before tonight. But there's a first time for everything, and today was one of those days. This afternoon I did a lot of new things, with a lot of success. Ladies and gentlemen, I give you the coffee-glazed turkey burger on a homemade brioche bun, with gorgonzola cheese, apple slaw, and a side of baked sweet potato fries.


This would've been a much prettier photo if I'd had a red onion handy. Or a good camera and photography skills.


There was a reason for the madness. First, this week's 52 weeks of cooking theme was coffee, and I didn't want to make tiramisu, mocha cookies, or a coffee-flavored barbecue sauce. I'd heard something about a coffee-glazed burger, so I decided to go that route. Then I noticed that this week's budget food challenge was for ground turkey, and I decided to consult my copy of the Flavor Bible and see what I could do to integrate both the coffee and the turkey. Coffee wasn't listed as a flavor affinity to the turkey, but after doing some more research I decided that it would be a nice complement.

For the buns, I used this recipe from Smitten Kitchen - this was also BB's afternoon project, since she loves to help me bake. Fun fact: 5 year olds don't seem to like the smell of yeast. The glaze was simple - I just added enough water to some decaf instant coffee and brown sugar to get a thin syrupy consistency, and I brushed it on some 1/4 lb turkey patties. The apple slaw was similarly simple: grate up some apples, chop up some dried cherries and a slice of onion, and stir it together with a few tablespoons of yogurt.

The meal was awesome. I was really surprised at how well everything went together, and how the strong flavor of the coffee made the turkey more flavorful. I even heard my parents talking about how good it was from the other room while I was attempting (and of course failing) to take a good picture, and we all wished I'd made bigger burgers and more sweet potatoes. Incidentally, it's also cheap - by my calculations based off of the amount of ingredients I used (yes, I measured) and the current price of everything at the grocery store, this meal cost $2.60 per person before tax, including the cost of the homemade buns (the price works out to be the same as a purchased bun). In a restaurant, this would have easily been a $10-12 plate with the portions I've listed below. You can't beat that with a stick.

Coffee-Glazed Turkey Burgers:

  • 1/4 oz instant coffee
  • 2 ozs brown sugar
  • 1 lb ground turkey
  • salt and pepper to taste
  • 4 hamburger buns
  • 2 tbsp butter, softened
  • 2 cups apple slaw (recipe follows)
  • 1/2 cup gorgonzola cheese

Add just enough water to the sugar and coffee to create a thin syrup. Season ground turkey with salt and pepper, then form into four patties and brush with coffee glaze. Spread butter on each side of the buns, and toast on a griddle at medium heat. Cook burgers on medium to medium-high heat for about 4 minutes per side, brushing on additional glaze after flipping. Put gorgonzola cheese on the bottom bun, then add meat and top with apple slaw.

Apple Slaw

  • 1 large apple (about 1/2 pound)
  • 3/4 ozs dried montmorency cherries, chopped
  • 1 slice onion (about 1 oz), chopped fine
  • 3 ozs (around 3 tbsp) plain yogurt
  • 3-4 drops lemon juice or 1/2 tsp Fruit Fresh (to prevent browning if making ahead of time)

Grate apple with a box grater. If making ahead, place in a bowl of water with lemon juice or fruit fresh to prevent browning until ready to use. Drain off any excess liquid from the apples, then stir together cherries, onion, and yogurt. Makes 2-3 cups

Baked Sweet Potato Fries

  • 3 lbs sweet potatoes
  • 4.5 ozs oil
  • 3 ozs brown sugar
  • 1 tsp cinnamon
  • salt and pepper to taste

Peel sweet potatoes and slice into thin medallions. Add oil, brown sugar, cinnamon, salt, and pepper, and toss to coat. Spread over a baking sheet and cook at 450 degrees for 20-25 minutes, turning every 8-10 minutes. Makes 4 large servings.

Total prep/cook time: 1 hour active cooking, 4 hours total (45 minutes total cook/prep if you remove the bread from the picture)
Happiness rating: 9/10
A Revelation - Banana Rum Cake

Over the weekend, I had so much free time and space in the kitchen that I went on an absolute cooking binge. A while back, I had made some white chocolate banana ganache with the intent of using it for truffles, but I made it a bit too thin. So, I set it aside to use for a cake glaze.

So, so very good.

A couple of years ago the entire family went to the Cayman Islands on a cruise, and of course we brought back a number of rum cakes and many different flavors of Tortugas rum. Banana isn't a flavor of rum that we drink very often unless we're making a couple of particular drinks, so there was plenty of it. So, late on a Friday evening, in the midst of my cooking spree, I went to town on making a rum-laden bundt cake.

Just after turning out and splashing a little rum on the top.

After I baked the cake, which used some banana pudding mix, a cake mix, and some pecans, I splashed it with a bit of rum and left a cup of rum in the middle, then covered the cake overnight. The next day, I made a glaze with sugar, rum, and butter and doused the entire thing with that. After letting that glaze soak in for a day, I topped it off with the white chocolate banana ganache.

Since we really do try not to keep a ridiculous amount of sweets at the house (though we usually fail), I sent the cake to the lodge with my dad last night, since they eat potluck-style. There were only ten men and a couple other desserts, but only three slices of this stuff made it back. I finally got to have a piece before bed, and WOW.... just wow. It's got just enough rum in it for you to feel the warmth in the back of your mouth when you swallow, but not enough to really taste the rum. You definitely taste the banana flavor, and the chopped pecans add a really nice crunch. There's obviously alcohol still in there (and you can smell it), so you might not want to offer it to a teetotaler. That's okay, though - more for us!

BB was my photography assistant today, and she frequently threatened to devour what little cake was left.


Banana Rum Cake
For the cake:

  • 1 package butter recipe cake mix
  • 1 package banana cream pudding mix
  • 3 whole eggs + 2 egg yolks
  • 1/2 c milk
  • 1/2 c oil
  • 1/2 c + 1 shot banana rum 
  • 1 c chopped pecans

Mix together all ingredients except pecans until the batter is well-integrated. Stir in pecans and pour into greased bundt cake pan. Bake at 325 for one hour, or until toothpick inserted comes out clean. Cool in pan for 10 minutes, then flip out onto rack to complete cooling for another hour. Splash shot of rum on the cake, especially around the interior ring. Cover and allow to set overnight before glazing.
For the glaze:
  • 4 tbsp butter
  • 1 c sugar
  • 1/2 c banana rum
  • 1/2 c water
Melt butter in saucepan over low heat, then stir in sugar and rum. Once well-integrated, increase heat slightly and add just enough water for sugar to dissolve into syrup. Remove from heat and allow to cool slightly, then spoon and brush over cake while still warm, taking care to cover the entire exterior of the cake. Allow glaze to soak in overnight for best results. Top with white chocolate banana ganache if desired.

White Chocolate Banana Ganache
  • 1/3 cup heavy cream or half and half
  • 12 oz bag white chocolate morsels
  • 2 tbsp banana extract
  • 1/4 tsp coconut extract
Heat cream and extracts in a double boiler until hot. Gradually add white chocolate, stirring until chocolate is completely melted and integrated. For thicker ganache suitable for truffles, decrease cream or increase chocolate until it reaches the desired consistency.  Allow to cool to room temperature, then use immediately or cover and store in refrigerator.

Total prep/cook time: 3 days, but only about 90 minutes of work.
Happiness rating: 10/10 - this thing disappeared fast!

Sunday, February 26, 2012

Mexican Red Sauce and Chicken Arepas

First, the non-food related stuff. I have come to the realization that my camera isn't going to be any easier to deal with anytime soon, and that the lighting at the house during the hours when I usually cook is nothing remotely near ideal for taking pictures. So I started thinking of buying a new camera that would allow me to do some manual focusing type stuff, and around that time my dad noticed that my car had gotten a flat tire over the weekend. Sometime in the past few days, something managed to slit a hole in my sidewall, and now I'm going to have to replace that. Since I'm still grad-student-poor, that means no new camera for me. Sigh.

While the pictures are going to remain in the crappy-to-mediocre territory, the food's still tasty. These arepas rocked my world.

And now, for the food! Since my TFoodie friends had asked me to write up the recipe for enchilada sauce that I'd finally gotten right, I made another batch today,  but kept it to a more saucy consistency. The great thing about the red sauce is that it can be used for so many different things - I use it along with chicken broth instead of water when cooking rice to make a very tasty spanish rice, pour it over hamburger meat to make tacos, thicken it up for enchilada sauce. I can even make it with hotter peppers and add some cayenne to make a spicy finishing sauce.

This recipe makes just under a quart. If I ever get around to it, I'll make bigger batches and pressure seal them.

Since we'd just had enchiladas the other night and I didn't feel like going through the trouble of tamales. Tamales and arepas are very similar, actually - both are filled masa dough, but arepas are fried while the tamales are wrapped and steamed. The red sauce went into both the filling and the masa - plus a little more on top. With a little sour cream and salsa verde, it made for a killer meal that we really loved.


Mexican Red Sauce

  • 1.5 ozs (about half a bag) dried guajillo peppers, seeded and cut into pieces
  • 3 c water
  • 1 c chicken broth (or stock for a thicker finished product)
  • 1/2 to 1 tsp salt
  • 1 tbsp garlic powder
  • 1 tbsp annatto
  • 1 tbsp cumin
  • 1 tbsp oregano
  • 5-6 drops lemon juice
  • fine ground masa harina or cornstarch (if thickening for enchilada sauce)

Place the peppers in a pot and cover with water, cooking over low heat for 30-45 minutes. Puree peppers with an immersion blender and allow to steep for another 5-10 minutes, then push liquid through a strainer and discard remaining solids. Return the liquid to a pot, and add chicken broth, salt, garlic powder, annatto, cumin, and oregano. Cook over medium low heat for another 10 minutes to allow spices to intermingle.

If thickening for enchilada sauce or other uses, continue to cook uncovered until reduced, or reduce the amount of water used. Replacing some or all water with stock will also promote thickening. Stir in masa harina or cornstarch and remove from heat.

Stir in lemon juice to finish.


Chicken Arepas

  • 1/3 cup lard
  • 3 cups all purpose or coarse masa harina
  • 1 c chicken broth
  • 1 tsp salt
  • 1 c mexican red sauce
  • 12 ozs canned chicken breast, drained and shredded

Pour half the mexican red sauce over the chicken and stir together. In a separate bowl, cut the lard into the masa with a fork or pastry cutter. Add salt, broth, and remaining red sauce to masa and work into a dough with the fork or by hand. Form the masa into patties and fill with the shredded chicken, making sure to seal off the ends. Fry in about 1/4" oil over medium-high heat until golden brown and cooked through. If not serving immediately, transfer to a foil-covered cookie sheet and keep warm in a 300 degree oven.

Serve with a dollop of sour cream and salsa verde. Makes 12 arepas.

Total prep/cook time: 1 hour for the sauce, 1 hour for the arepas
Happiness rating: 9/10

52 weeks of cooking, Week 8: Chunky Slow Cooker Applesauce

Again with the 'I'm on my own this weekend' thing, as well as the 'all my good kitchen equipment is in storage' thing, I didn't want to do some big meal in a crock-pot, as I didn't want to load the fridge down with a bunch of leftovers. Thankfully, my mom has a tiny crock pot that's meant for dips and such, but it also worked perfectly for a small batch of applesauce. I went for the chunky skin-on kind, which I'll either use in the big chunks or milled down to make some apple muffins later in the week.

Ugly picture, but tasty applesauce. It might even get turned into apple butter.

I personally didn't add any spices, since I plan to use this for another recipe. If I mill it into a jar of apple butter, I'll simmer it for a while longer with some allspice, ginger, nutmeg, cinnamon, and cloves. If I decide to make it into a filling, I'd just stir in a little cornstarch and cook it until the liquid thickens a touch more. It's really versatile stuff.

Small Batch Slow Cooker Applesauce:

  • 2 gala apples, chopped
  • 1.5 cups apple cider
  • Cinnamon, allspice, nutmeg, cloves and ginger to taste
Put apples in a small slow cooker and add just enough cider to cover. Add spices if desired. Cook for 4-6 hours or until apples are soft and tender.

Friday, February 24, 2012

52 weeks of baking, Week 8: The Easter Basket Cupcake

As usual with decorating challenges, this was really a challenge. That said, after seeing the kit-kat basket cake posted, I decided that I needed to make an easter basket cake. We already had jellybeans on hand, and I thought I'd grab something to use as basket weave. Twizzlers taste nasty in my opinion, but when I found the filled twizzlers at the store the other day, I decided to give them a shot. In the end, it turned out very cute, but when you consider the fact that I spent 45 minutes on icing, decorating, etc., that's a lot of time for a single cupcake. I likely won't do it again.

As much LOTR as I've been watching lately, this really is 'one cupcake to rule them all'.

Since it's just me for the weekend and I had no desire to decorate an insane number of cupcakes right now, I ended up using this recipe - which made seven small cupcakes, of which I crumb coated three (after peeling off the paper) and used just one. Incidentally, I haven't tasted the cupcakes yet, but they seemed a little dense to be white cupcakes, and I probably won't use that recipe again. I'd pulled out my copy of Ratio earlier before googling, and I'll likely just make a white sponge in the future if I need a small batch.

Cupcakes and supplies. It really was a quick and dirty job, despite the time involved.

To decorate, I made a half batch of the icing I used in this post and crumb coated, with a generous amount on top. I split the filled Twizzlers down the middle, and let the filling aid in gluing the basket weave portion onto the cupcake. I carved out a little hole on either side of the cupcake and filled it with icing, and used that to glue in the red Twizzler handle. Jelly Belly jellybeans topped the whole thing off.

Mid-decoration. Bifurcating filled Twizzlers isn't as simple as it sounds. Those things are gummy.

Total prep/cook time: 2 hours
Happiness rating: Meh. Too pretty to eat.

Monday, February 20, 2012

The date is set.

Yep, I finally got confirmation this afternoon that my dissertation defense will be on Wednesday, March 28, at 1:30 in the afternoon. In just over a month, I'll finally be done with grad school. Of course, I'll still be biding my time and anxiously awaiting my move to start the new job, but that's something completely different.

Anyway, woohoo!

Friday, February 17, 2012

Paradise by the Oven Lights (aka Meatloaf)

When asked what we should have for dinner tonight, I did a quick mental inventory of what proteins we had in the freezer and what we'd been eating lately. I came to the realization that we had quite a bit of ground beef, but that we hadn't actually used ground beef in a few weeks. Since I really didn't want to eat any more chicken, I gave the family the option of hamburgers, hamburger steaks, or meatloaf. Meatloaf was the consensus, and I'm really glad that it was.

It was half gone before I could even take a picture.

When discussing how much to make, my mother mentioned that she didn't like leftover meatloaf. Of course, that meant that my brain clicked, and I recalled just how much my dad and I do like leftover meatloaf - the flavors meld together even better after a day or so, and a slice of meatloaf makes for a great sandwich filling. So, I decided to use two pounds of meat instead of the one. And for the first time, I finally documented how much I used of what when I made it, so I finally have a recipe.

The real secret is the use of oats, which is much more nutritious than solely using breadcrumbs. It also absorbs more moisture, so you don't need as much filler, and you don't end up with a large pool of grease in the bottom of your pan. Also, the sauce is ketchup-based, but it isn't just ketchup - there's mustard, brown sugar, and worchestershire in there, and that makes all the difference.

Beef and Oat Meatloaf

For the meatloaf:

  • 2 lbs ground beef (around 85% fat - filler may need to be adjusted according to fat content)
  • 4 cloves garlic, minced (about 1/4 ounce)
  • 1 bell pepper, chopped (about 3 ounces)
  • 1/2 large onion, chopped (about 4 ounces)
  • 5 ounces dry oats (about 2/3 cup)
  • 4 ounces breadcrumbs (about 1/2 cup)
  • 2 tsp fine ground sea salt
  • 2 tsp black pepper (less if freshly ground)
  • 1 large egg
  • 4 shakes worchestershire sauce (around 1 tbsp)

For the sauce:


  • 4.5 ounces ketchup
  • 1.5 ounces brown sugar
  • 6 shakes worchestershire (about 1.5 tbsp)
  • 3/4 ounce spicy brown mustard


In a large bowl, mix together vegetables and dry ingredients. Add beef and egg, and mix together with clean hands until the mixture comes together and is slightly tacky. If mixture is too dry, a small amount of water or vegetable juice can be added. In a separate bowl, stir together sauce ingredients. Coat an 11x7" casserole dish with vegetable oil. Form the meat mixture into a long loaf and place in casserole dish. Bake in a 350 degree oven until a probe thermometer positioned in the center of the loaf reads 155 degrees, adding sauce to the top of the loaf after about 30 minutes, or when thermometer reads around 125 degrees. Serves 5-6.

Total cook/prep time: 1.5 hours
Happiness rating: 8

Wednesday, February 15, 2012

Bacon Roses!

Pretty!

KB's wanted to make bacon roses with me ever since I came across the instructable last year. For Valentine's day, I decided to oblige her, and to complete the Valentine's day themed cooking and bacon challenges. There really isn't much need for a long and detailed explanation of what was done, since there's already an excellent guide out there, so I'll let the pictures do the talking.


Who needs a drill and real pans? Disposable works well. So does a phillips-head screwdriver.

13 strips of bacon to a pack... 12 cups. Challenge accepted.

Baking complete. A little cooling, and then they're ready to stem.

KB is in her tweenie years, which means she is physically incapable of expressing excitement. Ah well.

Overall, a fun project, and one I'll likely do again. I mean, it's BACON, and it isn't overcooked and crunchy and gross. Soft, perfect, pretty bacon is the way to go.

Total prep/cook time: 1 hour, including all the time it took to prep the silk flower stems.
Happiness rating: 12/10. Om nom nom.

Saturday, February 11, 2012

52 weeks of baking, Week 6: Strawberries, Chocolate Mousse, and Nutella-filled Tuiles

So this week's theme for the baking challenge was 'elegant', and I had to think long and hard for something that might qualify. I'm not a great decorator by any stretch of the idea, I have little artsy talent and NO photography skills, so it took me the full four weeks of advance notice to come up with an idea for this week. BB's been asking for chocolate whipped cream, and KB loves pirouline cookies with hazelnut filling as well as strawberries, so I decided to go for a combination of it all. The results were nowhere near as elegant as I would've liked, but still kinda pretty, and very tasty.

You can't see it, but that tuile is filled with hazlenutty goodness.

Last night, I cut up strawberries and gave them a good coat in sugar, and made some very thin ganache with milk chocolate and a small bit of dark chocolate. This afternoon, BB and I whipped in a little more cream, added some gelatin (though not enough, but she dumped the packet instead of sprinkled, so there were complications), and put the mousse in the fridge until they and my mom could get through the rest of their bake sale cooking. When I finally got a chance, I made up my batter - two batches, actually. The first stick of butter I grabbed from the basement fridge was from my old house and had acquired a bit of fridge funk. It was my first Betty Botter moment, and it made me feel kinda stupid, considering that I'd had that rhyme stuck in my head for a few weeks now.

I used egg molds instead of flatter forms, but wish I had used a plate or cardboard, as these turned out a bit thick.

Once they came out of the oven, I used the handles of wooden spoons to roll them up, and of course burned my fingertips a little. It was a real pain to try and get them to hold a round shape - partially because they were too thick, and partially because they're just a pain to work with. Nonetheless, I did achieve some semi-roundness, and some burnt fingertips.

The picture doesn't really show the heat well. Owie.

Once they'd cooled, I thought I'd fill them with nutella using my berliner tip, normally reserved for doughnuts. Protip: nutella is too thick to use with a berliner tip. I ended up switching to a 230 tip, which is for filling cupcakes and such and which worked much, much better. Still, nutella and piping don't get along well.

The cute jar mocks my attempts to tame it with a berliner tip.

So, all worked out well in the end. I was able to get the nutella in the tuiles, and put it all into the dish with nice layering, etc etc. When you dipped your spoon all the way down to the bottom and got some strawberry with the chocolate, or a bite of strawberry with the nutella tuile, it was awesome. So, even if it wasn't too elegant in its presentation, at least it was elegant in its flavors.

Vanilla Tuile Cookies

  • 1/2 stick softened butter
  • 1/2 cup confectioner's sugar
  • 2 egg whites
  • 1/4 teaspoon vanilla
  • 1/2 cup soft wheat all-purpose flour or cake flour

Cream butter until smooth, add sugar, eggs, and vanilla and mix until well integrated. Add flour and mix until incorporated, then transfer batter into the refrigerator for 30-45 minutes. Spread over a thin form onto a silpat mat, and bake at 325 for about 10 minutes, or until the edges of cookies are slightly brown. Quickly roll up or press onto forms and allow to cool. Makes 8 cookies.

Total prep/cook time: 90 minutes, including all the time put into the strawberries, ganache, and tuiles.
Family happiness rating: 8/10
Friday, February 10, 2012

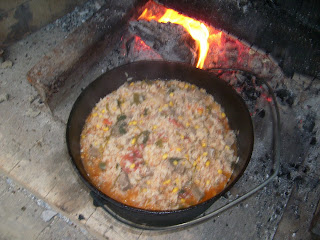
52 weeks of cooking, Week 6: Arroz Carreteiro, Cowboy Style

Nom.

I don't know whether I've mentioned it on the blog before, but folks who know me also know that my dad's been building a huge outdoor fireplace/smoker. It's really coming along nicely, as you can see.

That big recess above the fireplace? That's where the TV will go. It's a shame I'll be moving away in August!


Earlier today there was a bit of back and forth over whether to cook a stew on the fire out there (dad's idea) or to cook my Brazilian-themed dish for this week's challenge (which is why I thought they'd been thoughtful enough to thaw out the beef in the first place). So, we compromised and did both! The bigass cast iron pot needed some seasoning after having been repeatedly cooked and cleaned on the fire, anyway. I saw no reason that a cowboy's dish that translates to 'waggoner's rice' wouldn't be better cooked in such a manner, so two birds, one stone, right? I started off with some very simple ingredients - beef, onion, bell pepper, garlic, salt, pepper, tomatoes, corn, and rice.

10 minutes of prep indoors, and everything from there on was done outside.

With some oil heated in the pot, I added in the garlic, onion, and pepper. It sizzled enough right away that I just gave it a little stir before adding the meat.

Veggies. And MEAT!

The lid went on, and that would be the last time I touched that pot without some welder's gloves. After a few minutes, I gave the meat a stir, then let it cook a little longer. I probably stirred it 2 or 3 times before the tomatoes and corn were added in.

I had to post a picture of these, because I think it's awesome that the gloves are called 'Blue Beast'. Also, kevlar? Badassery.

Anyway, in went the tomatoes and corn, and I let everything cook over the fire for a bit before adding some additional water and stirring in the rice.

It was also a bit cold today, so the heat from the fire was nice.

We ended up keeping it on the fire for about two hours total, although it really could've come out after an hour. When we decided that it cooked long enough, we took it off the hook and set it in the fireplace near the coals to keep warm. Two hours later it's sitting on silicone trivets in the kitchen, and there's still a bit of steam coming up when the lid is opened.

Just after being taken off of the flame. We let it sit near the fire for another 45 minutes or so.

All in all, it was good stuff! I didn't add much salt and pepper at the beginning, so that was added at the individual level. I always like to be cautious with salt since you can't take it away once you've added it, so there's that. I also wish I'd added some latin american peppers into the mix, but we each added our own favorite blends of hot sauce to taste.

Okay, so it wasn't really roughing it, but the 'cowboy style' meal was a nice way to fake it. Not too bad for a February afternoon outdoors.


Arroz Carreteiro (Waggoner's Rice)

  • 3 green onions
  • 1/2 yellow onion
  • 1 large green bell pepper
  • 5 small cloves garlic
  • 2 lbs beef shoulder, cut into cubes
  • 1 quart jar tomatoes
  • 1 can 'mexicorn' or whole kernel corn
  • 3 cups long grain white rice

Chop onions and pepper into small pieces, mince garlic, and add salt and pepper to taste. In a large pot, heat cooking oil over a fire and add vegetables. When vegetables become fragrant, add beef and allow to brown, stirring as necessary. Add tomatoes and corn, and 2-3 cups of water as needed. Cover and bring to a boil. Add rice and replace cover, stirring occasionally to prevent scorching on the bottom of the pot. Serves 6-8.

Total prep/cook time: 2 hours
Family happiness rating: 7/10

Wednesday, February 8, 2012

Hooray for good news!

I've been working on grants for the nonprofit I'm donating time to all day, making truffles, cooking dinner, etc. for most of the evening, but I did want to publicly state that I got word today that I've been cleared to schedule a dissertation defense.

I'm actually going to finish, which means that I'll have my job this fall, which means that my move is still on for the summer. What a huge relief!

Anyway, I just wanted to share that.

Tuesday, February 7, 2012

Roast chicken and sun dried tomato pasta

There's been a whole chicken in the fridge for a couple of days, and my mother mentioned that they'd planned to boil it for dinner. That's right, I said boil it - something which is downright criminal. I put a quick stop to that, and decided to roast it. Even though I'd been out and about blowing off steam after a particularly grouchy day, I still was able to put together dinner with minimal effort. To go along with it, I cooked up some peas from the garden, and one of my favorite easy pastas.

Serious noms. Seriously easy.


If you aren't aware, there's a trick to roasting chicken. Some will argue that cooking a bird breast-side down makes the meat more moist, and some argue otherwise. What's rarely mentioned, however, is that you can cook it breast-side down until it's nearly done, then flip it breast-side up. That way, many of the juices that have drained downward into the breast meat and the pan are able to run back into the rest of the bird. I'm a huge fan of probe thermometers when I cook large pieces of meat, so I usually cook it breast-down until 145 degrees, turn it, and then cook it breast-up until 165 (I sometimes wait an extra few degrees in the case of turkeys). Most days I prefer to brine my meat, but since I got a late start tonight, it just got some salt and pepper, then into the oven it went. Simple, right?

Just pre-flip. It's got a lovely golden color.

The pasta is also very easy - just chop up a few cloves of garlic and half an onion, put some sun-dried tomato bits into a little water to slightly re-hydrate, and even include some bacon in little pieces if you like. Just after the linguine went into the water, I started to cook down the onion and garlic with a little olive oil. Then I added a couple of ladles of pasta water before stirring in the tomatoes and bacon bits.

Just after dumping in the tomatoes, but before stirring them in. Having them slightly rehydrated spreads the flavor around and gives the that pretty reddish tint.


The veggies sat on mid-low heat until the pasta was fully cooked and drained, then it was all stirred in. Add a bit of salt and pepper, and sprinkle some feta or goat cheese on top, and you have a fantastic meal.

After dinner, I made a lot of ganache for five different types of truffles, but that'll be another post once they're complete. All the ganache is setting up in the fridge, so I can roll them up and package them when I get home tomorrow.

Total prep/cook time: 60 minutes
Family happiness rating: 8/10

Friday, February 3, 2012

52 weeks of baking, Week 5: Apple danish loaves

I think I've outdone myself, breakfast wise. I've made coffee cakes, doughnuts, and various other breakfast goodies in the past, but when we realized that we had dried apples that needed to be used, I got to work.

If I can't get the whipped cream 'fuzz' off my lens, I might be shopping for a new camera.

These weren't just any apples, either - they were the last batch from the apple tree in the back yard, before it mysteriously died last year. These apples needed love and respect, and I think I've honored that. On Monday evening, I gave them a good rinse and began simmering them with a bit of sugar, nutmeg, cinnamon, allspice, and ginger. Once they cooled, I put them in the basement fridge until I could get the pastry dough made, which I did on Wednesday night. I'd been wanting to make some -real- pastry, and so I decided to go with danish dough. I used 1/5 of the recipe for danish dough from page 235 of Baking & Pastry: Mastering the Art and Craft. It tasted quite salty before I let it rise and rest overnight, and I was a bit worried - enough so that I even added in a little extra sugar. But, recipes can be deceiving, so I went with it.

I can't believe that this was the first time I'd rocked my KitchenAid's dough hook.

Yesterday afternoon, we took it out of the fridge, and BB beat out the butter for the roll-in while I rolled it into a rectangle. We rolled in the butter, and of course, she had to help.

We're going to have a talk about the need for ponytails while baking, because her hair's almost that long.

After giving it a four-fold, resting half an hour, splitting it, giving it a 3-fold, then another 3-fold half an hour after THAT, then even more resting, it was finally time to get to filling. Following the technique from the same book, on page 630, for what they call a 'Braided Coffee Cake' (not that I consider this to be a coffee cake in the slightest, since coffee cake is dense and has a crumbly topping), I cut some angled strips onto either side of the dough, keeping a big long patch in the middle, then filled it with apples and started to 'braid' it up by alternating sides as I folded the strips over the top.

It was kind of a pain to tack the ends together, but thankfully there wasn't a ton of leakage.

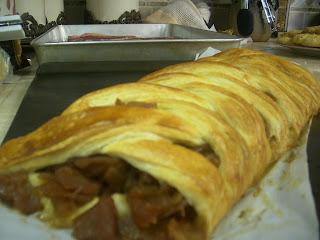
Once it was all finished, I had two huge loaves of apple danish, about 18 inches long each. They went into the proofing drawer of the oven for an hour and a half, and wow did they rise! I actually had to separate them onto two different baking sheets after the rise time, because while I expected SOME rising, my yeast was a little old and I didn't expect it to be that active.

It went from this....

to this! I guess that yeast was still pretty active after all.

Finally, it got a second egg wash, and went into the oven for around 35 minutes at 350. What came out really did amaze us, and we found ourselves picking at one of the loaves after dinner last night (the one that left us stuffed, and for which we had bananas foster as dessert - these are THAT tempting).

Tons of apple-filled deliciousness.

This stuff is absolutely divine. Even though the saltiness did decrease tremendously, I would definitely use a little less the next time around (and I've decreased it in the recipe below). The flakiness and texture of the dough is amazing, and the spiced apples are soft, but still have a tiny bit of bite to them. All in all, the perfect way to use the last apples from our dearly departed tree.

Danish Pastry Dough
creates about 2 lbs dough

  • 362 g bread flour (12.8 ozs)
  • 42 g sugar (1.45 ozs)
  • 5.6 g instant yeast (0.6 ozs)
  • 3 g salt (0.1 ozs)
  • 34 g softened butter (1.2 ozs, about 1.5 tbsp)
  • 74 g eggs (2.6 ozs, or one extra large egg)
  • 168 mL milk (5.6 ozs, or 2/3 cup plus 1 tbsp)
  • For the roll-in: 272 g chilled butter (9.6 ozs, or 2 sticks + 2.5 tbsp)
Mix together the dry and wet ingredients with a dough hook until well integrated. Transfer to a floured surface and let rise at 75 degrees or in a proofing drawer for two hours or until doubled in size. Punch down, roll out into a large rectangle, fold, and wrap tightly with plastic wrap. Store in refrigerator at least 8 hours, or overnight, to let gluten relax completely.

After overnight rest, pound out roll-in butter until pliable. If butter becomes warm, return to refrigeration and chill slightly. Roll the dough into a large rectangle, and spread the butter over half of the rectangle. Fold the dough over, press out any air bubbles, and pinch the ends together, then roll out and do a four-fold (fold each end into the middle, then fold at the middle like a book). Return to the refrigerator for 30 minutes, then roll out again, and do a three-fold (as if folding a letter for an envelope). Chill in the refrigerator another 30 minutes, do a second three-fold, then refrigerate 30 more minutes.

Roll out the chilled dough and shape and fill as desired on parchment paper. Once shaped/filled/etc, coat with egg wash and place in a proofing drawer or warm place and let rise for 90 minutes at 85 degrees. After rising, add another coat of egg wash, and bake at 350 for 30-40 minutes, or until golden brown.


Total cook/prep time: 16 hours - 30 minutes to mix, 2 hour rise, 30 minutes shape/roll/wrap, 8 hours rest, 3 hours roll-in and fold, 90 minute rise, 30 minute bake. It's less time than it sounds!
Family happiness rating: 10/10. This stuff isn't going to last long.

Thursday, February 2, 2012

52 weeks of cooking, Week 5: A booze-infused meal for the ages

I've just finished eating dessert, and all I can say is -wow-. I am absolutely stuffed, and everything tonight was fantastic.

Unspeakably delicious. 


Just for a quick run-down of the menu, here's what I served:

  • Salad with a viniagrette made from red wine my parents bottled in 1998 (it's long since peaked, sadly)
  • Beer bread with Sam Adams Cherry Wheat
  • Abita Amber onions
  • Shrimp Scampi using a riesling (on hand from the frog leg dinner)
  • T-bone steaks
  • Baked potatoes
  • Bananas Foster made with Tortugas Banana rum
I would post recipes, but honestly, nothing that I made is that counter-intuitive. Viniagrette is just some vinegary wine and olive oil, plus some spices. Beer bread is 3 cups of flour, 3 tsp baking powder, 1 tsp salt, 1/4 c sugar, and a beer. Scampi is just white wine, butter, garlic, and parsley on shrimp, and can be either baked or sauteed. Bananas foster is just butter, brown sugar, bananas, and rum poured over tea cakes (I halved Paula Deen's recipe and made very large ones).

I'm too food-drunk to post more pictures, or to post the amazing results of this week's baking challenge. Oof.

This was the last picture I managed to get before my camera faceplanted itself in that whipped cream. I don't blame it, it was pretty tasty.


Besides, I have to go clean all the whipped cream off the lens of my camera now.

Om nom nom.

Total prep/cook time: 3 hours, with everything from scratch.
Family happiness rating: This one goes up to eleven!